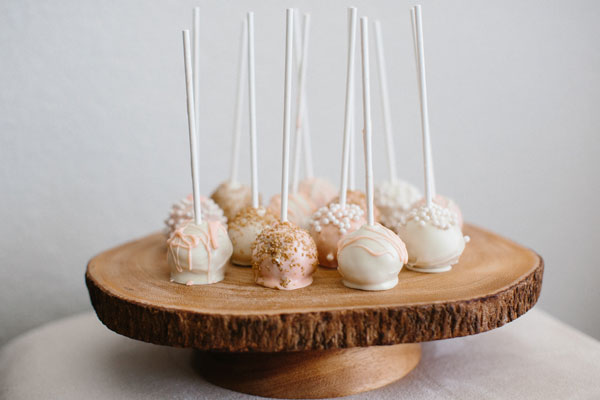
Why am I blogging a cake pop recipe you might ask? Because it’s Friday. Aaaaand I mean, cake pops. Really, do I need to explain it further?
So, if you’ve never made them before, here’s the thing about cake pops. They’re actually very easy to make! (Which should be pretty obvious considering I can successfully make them.) They just take a LONG TIME. Like, hours. In other words, don’t decide you feel like some cake pops and then think you can whip them out in 45 minutes. Be prepared and make some for yourself with plenty of time before the craving hits ;)
In a nutshell, you have to bake a cake and let it cool, make the cake balls and chill them, and then coat every single one individually. Yeah, legitimately takes hours. BUT, it truly is pretty simple. Lucky for you, I’ve laid it all out below! (Ok, ok. This might be mostly for me because even though I’ve made them a few times, I always have to google a recipe juuuust to double check I’m not forgetting anything.)
Ingredients and Supplies:
~ A box of cake mix (and all the ingredients to bake the cake)
~ A can of frosting
~ A decent amount of baking chocolate or candy melts (very specific, I know)
~ Sprinkles, food coloring, and/or anything else desired to decorate
~ Lollipop sticks
Part 1:
Bake the cake. (See, I told you this was easy.) Once it’s baked, let it cool completely. Now comes the fun part. Literally take the entire cake out of the pan and mash it up into a bowl. You want it to be very crumbly. You can use your hands, or a food processor if you have one. (I used my hands, way more rewarding. Haha.)
When your cake is totally mashed up, begin adding spoonfuls of frosting and continue to mix it together. (The amount of frosting that you use is kind of a personal preference, but if you are planning on using sticks, you won’t want to use quite as much because the balls will fall off of the stick if they are too gooey.) You want it to be similar to the consistency of clay. I used about half the frosting, for reference.
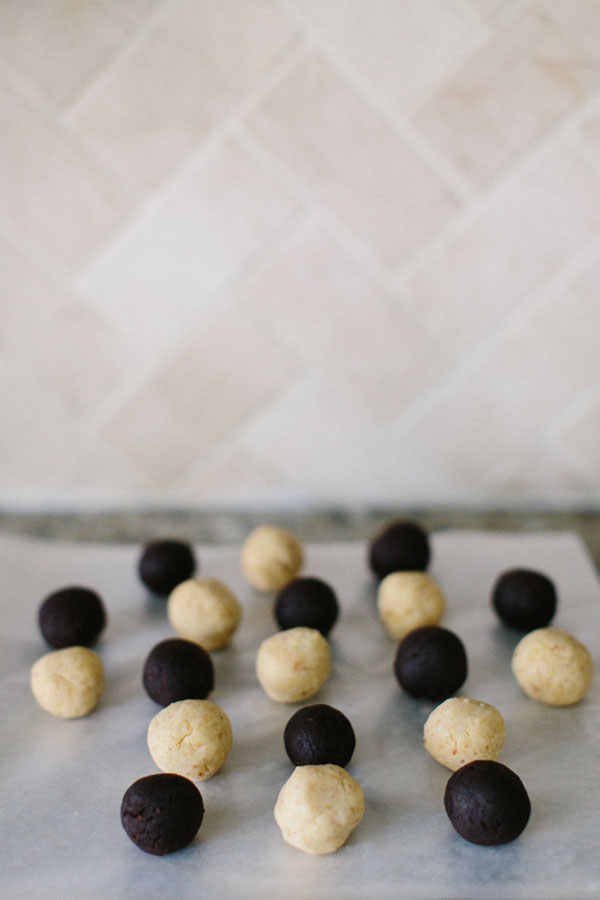
Then, when you have your cake dough, begin rolling them into little balls and placing them on a cookie sheet or plate, covered in wax paper. A good size is about 1.25 inches. (You can make them bigger, but keep in mind when you dip them it makes them substantially larger, and the bigger they are the more likely they are to fall off of the stick because of weight.) Finally, when they’re all rolled, stick them in the fridge for a few hours to chill them. (You can stick them in the freezer if you’re short on time, but for some reason I think they turn out better if you keep them in the fridge. Just be sure not to leave them in the freezer for too long.)
I made both yellow cake and chocolate cake pops.
Part 2:
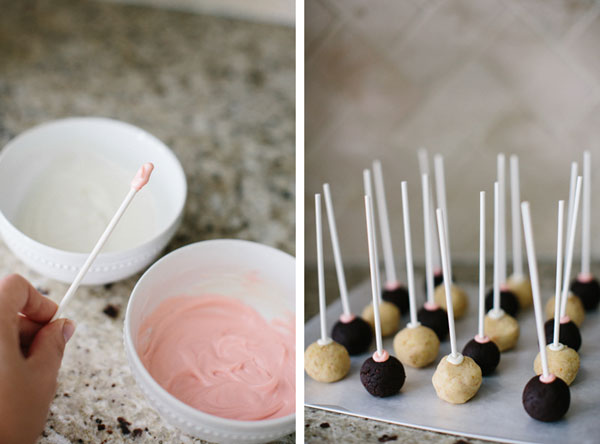
After they have chilled, microwave your baking chocolate in 30 second intervals at a slightly low power setting. Stir in between intervals and keep going until the coating is totally melted. (It’s good to do the intervals because if you cook it too hot too fast it becomes lumpy. Learn from my mistakes. Ha.) Once smooth, this would be the time to add food coloring if you want it to be a specific color.
Next, take a few of the cake pops out of the fridge. (I realized it’s really helpful to just do a few at a time and keep the others in the fridge so they stay chilled until you’re ready to coat them.) Take a stick, dip the end into the melted baking chocolate, and stick it into one of the cake balls. Continue until those few cake pops all have sticks.
Now it’s time to coat them! Here’s where my kitchen amateur-ness really shines. I have yet to figure out how to make them totally smooth. Some recipes will tell you to dip it completely, some will say twirl it in the coating… I say do whatever you want. Haha. For me personally, I have the best results dipping it about half way in and then spooning the chocolate on the top and trying to smooth it around with the spoon. The real key is to make sure your cake pops stay cool and your baking chocolate stays warm and melted. Just be sure to be gentle so the cake ball doesn’t fall off stick. (This is definitely the most time consuming part, fyi.)
Once your cake pop is coated, decorate to your hearts desire! Then set it out to let the coating harden completely. (Oh also, some people will get a styrofoam block and then stand the coated cake pops in it so they are upright. But that was way too ambitious for me. Ha.)
Then voila!!! You have some delicious cake pops. And any day gets a little better if there’s a cake pop involved.
Happy Friday everyone :)


