Red Cliff Ranch Wedding: Britney + Cole

Britney and Cole are the kind of people that draw others in. They bring so much joy to everyone around them because of their positivity and caring personalities. They also know how to throw an amazing celebration. Wrap that all up into a perfect October day at a beautiful ranch and you have one absolutely incredible wedding! These two worked hard to plan the perfect day, and not only was every last detail completely stunning, they made sure that all their guests were comfortable and having a good time. It was truly a day to remember! And so much fun to be a part of. Brit and Cole, thank you for choosing me to be your photographer!! Your wedding was one for the books and I am so happy that I got to play a small part in the beginning of your forever! Love you guys. XO.

Britney&ColeWedding-1
Britney&ColeWedding-2
Britney&ColeWedding-3
Britney&ColeWedding-4
Britney&ColeWedding-5
Britney&ColeWedding-6
Britney&ColeWedding-7
Britney&ColeWedding-8
Britney&ColeWedding-9
Britney&ColeWedding-10
Britney&ColeWedding-11
Britney&ColeWedding-12
Britney&ColeWedding-13
Britney&ColeWedding-14
Britney&ColeWedding-15
Britney&ColeWedding-16
Britney&ColeWedding-17
Britney&ColeWedding-18
Britney&ColeWedding-19
Britney&ColeWedding-20
Britney&ColeWedding-21
Britney&ColeWedding-22
Britney&ColeWedding-23
Britney&ColeWedding-24
Britney&ColeWedding-25
Britney&ColeWedding-26
Britney&ColeWedding-27
Britney&ColeWedding-28
Britney&ColeWedding-29
Britney&ColeWedding-30
Britney&ColeWedding-31
Britney&ColeWedding-32
Britney&ColeWedding-33
Britney&ColeWedding-34
Britney&ColeWedding-35
Britney&ColeWedding-36
Britney&ColeWedding-37
Britney&ColeWedding-38
Britney&ColeWedding-39
Britney&ColeWedding-40
Britney&ColeWedding-41
Britney&ColeWedding-42
Britney&ColeWedding-43
Britney&ColeWedding-44
Britney&ColeWedding-45
Britney&ColeWedding-46
Britney&ColeWedding-47
Britney&ColeWedding-48
Britney&ColeWedding-49
Britney&ColeWedding-50
Britney&ColeWedding-51
Britney&ColeWedding-52
Britney&ColeWedding-53
Britney&ColeWedding-54
Britney&ColeWedding-55
Britney&ColeWedding-56
Britney&ColeWedding-57
Britney&ColeWedding-58
Britney&ColeWedding-59
Britney&ColeWedding-60
Britney&ColeWedding-61
Britney&ColeWedding-62
Britney&ColeWedding-63
Britney&ColeWedding-64
Britney&ColeWedding-65

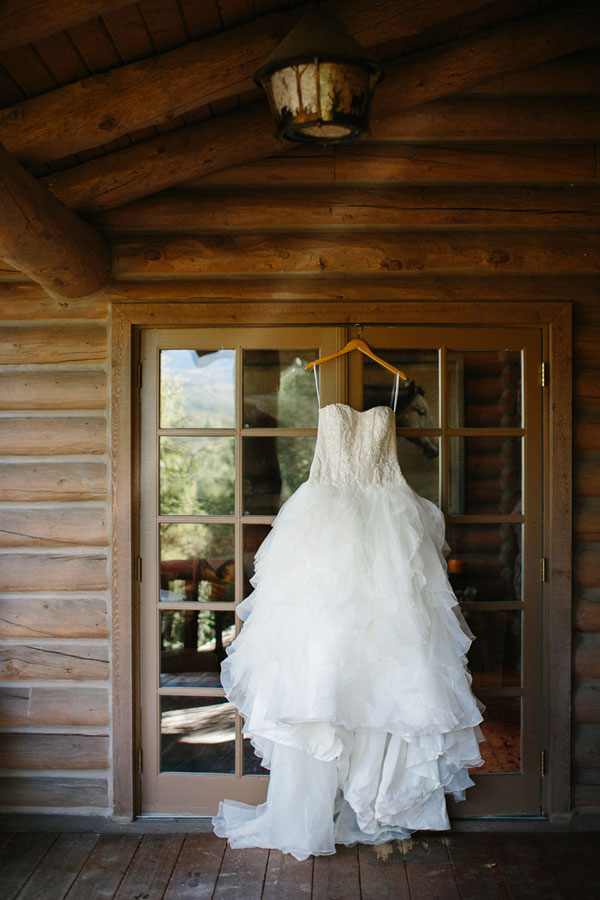
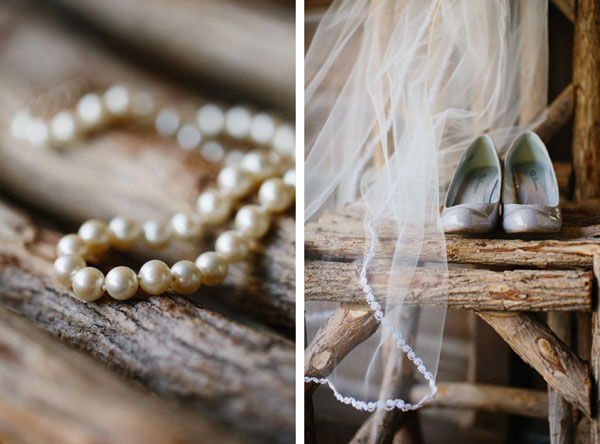
Venue: Red Cliff Ranch | Catering: Lori Tolbert | Cake: Midway Country Corner | Florist: Five Penny Floral | Hair and Makeup: Tina Metcalf | DJ: Life of the Party | Invitations: The Write Image | Brides Gown: Oleg Cassini via David’s Bridal | Shoes: DSW | Pearl Necklace: From Bride’s Grandmother | Groom and Groomsmen’s Suits: The Ritz | Bridesmaid Dresses: David’s Bridal | Rentals: Diamond Rental | Officiant: Trish Walker | Instrumentals: The String Quartet | Restrooms: Royale Restrooms of Utah 

Happy 4th!

I can hardly believe it’s already time to celebrate the 4th of July!! (Anyone else freaking out about the fact that we’re half way to Christmas?! No, too soon? My bad.) I hope you all have plans of delicious BBQ’s, parades, soaking up the sun, and epic fireworks!

Sadly, we don’t have any huge plans because Jake has to work most of the weekend and we’ve all come down with a bit of cold, but I’m excited to take Natalie to see fireworks! Last year she was only 9 months old. Still, I thought for sure she would love watching the fireworks. Boy was I was wrong. She definitely just chilled on the blanket and gave the firework show a solid “meh.” Haha. Buuuut I think I can assume things are going to be different this year! ;)

4thofJuly-8
4thofJuly-10
4thofJuly-5
4thofJuly-6

‘Merica.

Happy 4th of July weekend everyone!! Just remember to stay safe! (Had to. It’s the mom in me.)

Walk Through A Wedding: Day One

Oh man you guys, today I am SO EXCITED to finally be sharing some of my favorite images from day one of the extraordinary Walk Through A Wedding workshop! I had originally planned to just do one blog post of day one and day two combined, but then I realized that it would be one incredibly  g i g a n t i c  post. Haha. So I’ve decided to break it into two posts! And day one is coming at you with all sorts of beautiful…

WalkThroughAWedding-1
WalkThroughAWedding-2
WalkThroughAWedding-3
WalkThroughAWedding-4
WalkThroughAWedding-5
WalkThroughAWedding-6
WalkThroughAWedding-7
WalkThroughAWedding-8
WalkThroughAWedding-9
WalkThroughAWedding-10
WalkThroughAWedding-11
WalkThroughAWedding-12
WalkThroughAWedding-13
WalkThroughAWedding-14
WalkThroughAWedding-15
WalkThroughAWedding-16
WalkThroughAWedding-17

WalkThroughAWedding-45
WalkThroughAWedding-18
WalkThroughAWedding-19
WalkThroughAWedding-20
WalkThroughAWedding-21
WalkThroughAWedding-22
WalkThroughAWedding-23
WalkThroughAWedding-24
WalkThroughAWedding-25
WalkThroughAWedding-26
WalkThroughAWedding-28
WalkThroughAWedding-27
WalkThroughAWedding-29
WalkThroughAWedding-30
WalkThroughAWedding-31
WalkThroughAWedding-32
WalkThroughAWedding-33
WalkThroughAWedding-34
WalkThroughAWedding-35
WalkThroughAWedding-36
WalkThroughAWedding-37
WalkThroughAWedding-38
WalkThroughAWedding-39
WalkThroughAWedding-40
WalkThroughAWedding-41
WalkThroughAWedding-42
WalkThroughAWedding-43
WalkThroughAWedding-44

I need to give a MASSIVE thank you to all the wonderful vendors who came together to make these images possible!! Thank you so much for your time, your talent, and your resources everyone!!! Stacie Shea Events | Carrie Wilcox Floral Design | Lovely Cakes | Simply Gorgeous by Erin | Everthine Bridal Boutique | Bella Bridesmaid | Five Dot Design | Marcardin Calligraphy | La Tavola Linens | Sperry Tents | Smith Party Rentals | And also our lovely, real life married couple Erin and Peter :)

And of course, one more incredibly huge thank you to the amazing Justin & Mary Marantz!! I can’t even put into words how thankful I am for all the hard work you guys put into teaching us those two days. You guys are the best. That’s it. (If you’d like to read my little recap of the workshop experience, you can do that HERE!)

Get excited for Day 2 pictures, coming soon! Happy hump day, folks!!

Cake Pop Recipe

Why am I blogging a cake pop recipe you might ask? Because it’s Friday. Aaaaand I mean, cake pops. Really, do I need to explain it further?

cakepops-13

So, if you’ve never made them before, here’s the thing about cake pops. They’re actually very easy to make! (Which should be pretty obvious considering I can successfully make them.) They just take a LONG TIME. Like, hours. In other words, don’t decide you feel like some cake pops and then think you can whip them out in 45 minutes. Be prepared and make some for yourself with plenty of time before the craving hits ;)

In a nutshell, you have to bake a cake and let it cool, make the cake balls and chill them, and then coat every single one individually. Yeah, legitimately takes hours. BUT, it truly is pretty simple. Lucky for you, I’ve laid it all out below! (Ok, ok. This might be mostly for me because even though I’ve made them a few times, I always have to google a recipe juuuust to double check I’m not forgetting anything.)

Ingredients and Supplies:

~ A box of cake mix (and all the ingredients to bake the cake)

~ A can of frosting

~ A decent amount of baking chocolate or candy melts (very specific, I know)

~ Sprinkles, food coloring, and/or anything else desired to decorate

~ Lollipop sticks

Part 1:

Bake the cake. (See, I told you this was easy.) Once it’s baked, let it cool completely. Now comes the fun part. Literally take the entire cake out of the pan and mash it up into a bowl. You want it to be very crumbly. You can use your hands, or a food processor if you have one. (I used my hands, way more rewarding. Haha.)

When your cake is totally mashed up, begin adding spoonfuls of frosting and continue to mix it together. (The amount of frosting that you use is kind of a personal preference, but if you are planning on using sticks, you won’t want to use quite as much because the balls will fall off of the stick if they are too gooey.) You want it to be similar to the consistency of clay. I used about half the frosting, for reference.

Then, when you have your cake dough, begin rolling them into little balls and placing them on a cookie sheet or plate, covered in wax paper. A good size is about 1.25 inches. (You can make them bigger, but keep in mind when you dip them it makes them substantially larger, and the bigger they are the more likely they are to fall off of the stick because of weight.) Finally, when they’re all rolled, stick them in the fridge for a few hours to chill them. (You can stick them in the freezer if you’re short on time, but for some reason I think they turn out better if you keep them in the fridge. Just be sure not to leave them in the freezer for too long.)

I made both yellow cake and chocolate cake pops.

cakepops-1

Part 2:

After they have chilled, microwave your baking chocolate in 30 second intervals at a slightly low power setting. Stir in between intervals and keep going until the coating is totally melted. (It’s good to do the intervals because if you cook it too hot too fast it becomes lumpy. Learn from my mistakes. Ha.) Once smooth, this would be the time to add food coloring if you want it to be a specific color.

Next, take a few of the cake pops out of the fridge. (I realized it’s really helpful to just do a few at a time and keep the others in the fridge so they stay chilled until you’re ready to coat them.) Take a stick, dip the end into the melted baking chocolate, and stick it into one of the cake balls. Continue until those few cake pops all have sticks.

cakepops-2

Now it’s time to coat them! Here’s where my kitchen amateur-ness really shines. I have yet to figure out how to make them totally smooth. Some recipes will tell you to dip it completely, some will say twirl it in the coating… I say do whatever you want. Haha. For me personally, I have the best results dipping it about half way in and then spooning the chocolate on the top and trying to smooth it around with the spoon. The real key is to make sure your cake pops stay cool and your baking chocolate stays warm and melted. Just be sure to be gentle so the cake ball doesn’t fall off stick. (This is definitely the most time consuming part, fyi.)

cakepops-6

Once your cake pop is coated, decorate to your hearts desire! Then set it out to let the coating harden completely. (Oh also, some people will get a styrofoam block and then stand the coated cake pops in it so they are upright. But that was way too ambitious for me. Ha.)

cakepops-8

Then voila!!! You have some delicious cake pops. And any day gets a little better if there’s a cake pop involved.

cakepops-10
cakepops-11

Happy Friday everyone :)


Real Life

There’s a movement happening on social media lately that’s all about being more honest and transparent. About showing real life instead of hiding behind our screens and only posting things that make our lives look picture perfect out of a magazine. Which I think is AWESOME. Because a lot of times, life doesn’t look like what Hollywood makes us think it should. It’s not flawlessly wrapped with a bow on top, and happily ever after doesn’t come without a fair share of unhappy days too. So seeing other people, real people that I am inspired by, posting about a struggle, or the mess, or an unchecked to-do list, has encouraged me more than they’ll probably ever know. It’s a reminder that everyone is human. That even the people who seem to have it together the most have their off days. And we are all in this together. Community over competition. That is something I want to be a part of. Can I get an amen?

With that being said, I realized if I wanted to be a part of this movement, a part of trying to encourage and lift others up and fight the fight together, I should probably actually do something, instead of just nodding my head at all the good ideas. I’ve put this post off for a while. Because it’s kind of embarrassing to acknowledge shortcomings. To admit my flaws. But if everyone kept putting off the raw and the honest, well, we’d be right back where we started. Soooo here goes. Here’s to real life!

~There are days when my head is bursting with ideas and creativity and I can hardly contain all the aspirations I want to chase, but then there are days when just making it to Natalie’s bedtime is a victory. And I still have a hard time balancing the two.

~ The dining room table is covered with fall and Christmas decorations that need to be put away. Although there’s a good chance they’ll just stay there until it’s time to put them out again.

~ I’m still struggling to lose the last of my baby weight from being pregnant with Natalie. Some days it’s easy to look at her and be amazed at what my body created and be totally ok with where I’m at. Some days I’m mad at myself for not eating better or working out more and I hate all my clothes for hugging me a little tighter. Ok, that’s actually most days. But I’m working on it.

~ I finally ordered some lamps for our bedroom in the spring, and when they came one of the lampshades was badly bent. I keep forgetting to order a new one. So Jake just has a stand with no shade sitting on his bedside table. (Let’s hope Target hasn’t discontinued that lampshade yet.)

~At least once a day I find myself checking Facebook or Instagram mindlessly out of habit while playing with Natalie. And then I feel like an awful mom because nothing online is more important than giving her my full attention.

~I’ve been home from my last trip for 10 days, and the suitcase is still sitting on the floor with clothes spilling out.

~The laundry situation is not even worth discussing.

~To end on a humorous note, some days life with a toddler is great. She’s happy and she’ll even pose for you in a cute hate.

Natalie-1

But other days, life is rough. Because apparently getting dressed can be the worst thing ever.

I hope that was an encouragement to some of you! Or at least made you feel a little bit better about your week ;) Happy hump day everyone!